A gyro is an essential piece of business aircraft avionics equipment. You invest a lot of money to keep it airworthy. And when it comes time for overhaul, you pack it up and send it in. But do you know what really happens when you send it in?
STOP! Before you run off to box and ship your gyro for overhaul, read this!
Why? Because if you don’t, this could happen!
And if it does…it could cost you lots of extra money. Here’s why.
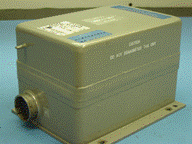
Here’s what happens to your L-3 Vertical Gyro during an overhaul at Duncan Aviation.
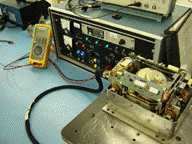
 Every gyroscope that arrives is run through the traps of an initial function test. This provides us with a clear picture of the condition of the unit upon arrival and a baseline of information about the indicator, autopilot and radar.
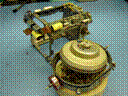
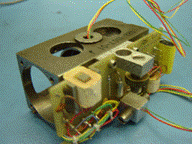
 All decals and paint are removed from the unit and the chassis is unsoldered from the base assembly. During this step, your gyro receives a thorough evaluation and the results are communicated to you prior to any repair or overhaul. We do this so that you are aware of all identified squawks and / or damage sustained during shipping.
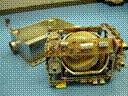
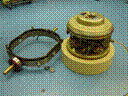
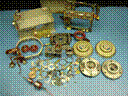
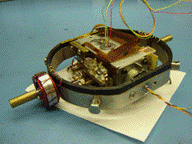
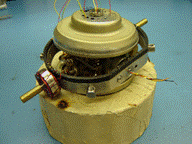
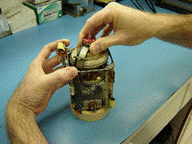
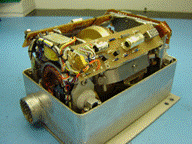
During the disassembly, every part is removed, cleaned and inspected for damage and proper function. At the end of this stage, the gyro is reduced to its most basic components.
|
|
|
|
|
|
|
|
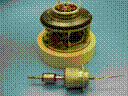
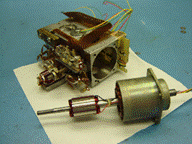
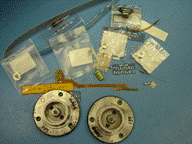 Per the L-3 Communications Vertical Gyro Component Maintenance Manual there is a required list of components that must be replaced with new OEM components. These parts include rotors, gimbal bearings and a spiral flex, to name a few. The rotors are rebuilt in-house at Duncan Aviation using our Rotor Pre-load Fixture and Rotor Balancing Machine.
If we were to stop with the required list above, the overhaul would be correct according to maintenance manual requirements and the vertical gyro could be returned to service with no issues. This is where most component service facilities stop. But at Duncan Aviation, we do more than what is required; we do the right thing.
Additional components, such as the Electrolytic Leveling Switches, are replaced. Because of our years of knowledge and experience repairing damaged gyros, we include the replacement of additional components as part of our overhaul. Doing only what is required is not always doing what’s right.
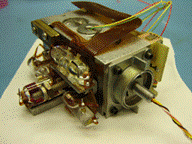
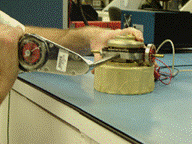
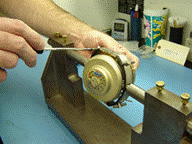
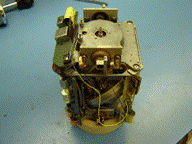
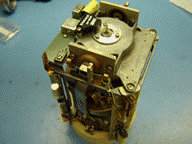
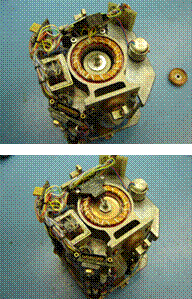
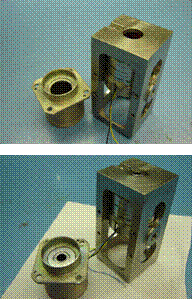
During the assembly phase of the overhaul, we put back together what we took apart, making sure all pieces and parts are clean and working properly.
 |
Inspect inner gimbal housing. Remove any Loctite residue from the housing and cup. Treat metal housing and cup with primer. Seat bearings flush and secure in place with new Loctite. Cure a minimum of two hours in an oven. Apply barrier coating. |
|
|
|
|
|
|
|
|
|
|
|
|
|
|
|
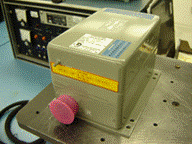
No overhaul is complete without proper calibration. Duncan Aviation performs the following calibrations:
After calibration we perform a 12 hour extended run and 12 hour cold soak cycle. Then we check the calibration again, making any necessary adjustments.
After a final inspection, we finish the assembly by solder sealing the chassis cover to the base assembly, using a sealing band.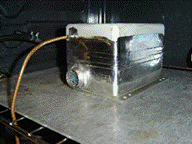
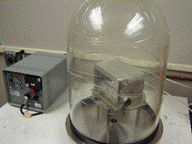
For the next two hours, your gyro is put in an oven under vacuum to remove any moisture inside, then backfilled with helium to atmospheric pressure per the manual. It is then placed in a bell jar (shown above) to test for leaks. This process is repeated until it passes specifications.
Only after your gyro passes a leak rate and function test, is your overhaul declared complete. It is then returned to you with a fresh coat of paint and new stickers!
Why is the gyro backfilled with helium instead of regular air?
Two reasons:
Important Information About Your Gogo Wi-Fi System
Do Not Delay. Your Honeywell MCDUs Are Facing Impending Component Obsolescence.
5 Reasons to Install A 5G Radio Altimeter Filter
Troubleshooting Lack Of Transmission Issues In Hawker 800XP HF System
It Is Easy To Avoid This Costly King Air Brake Fluid Reservoir Mistake